Replacing Mega Drive / Genesis controller conductive pads with PS2 pads
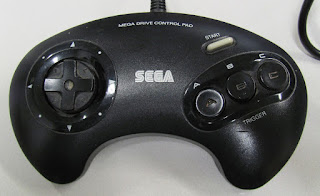
I had urge to play some emulated Sensible Soccer but wanted to use the original Mega Drive (Genesis) controller. Unfortunately the only controller I have is not working very well. The conductive pads for buttons are almost gone. I cleaned this one in a previous post https://strangegamepads.blogspot.com/2019/05/sega-megadrive-3-button-controller.html
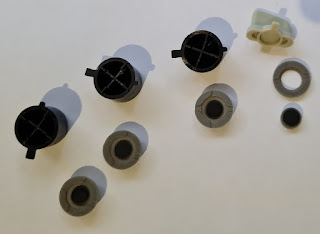 |
| Sad state of the original conductive pads |
I still don't have the proper conductive pads for this and replacement pads are still quite hard to find and expensive. However I noticed by accident that the PS1/PS2/PS3 controller conductive pads for the buttons are almost exactly the same size.
 |
| Mega Drive pads on top of PS3 (left) and PS2 (right) pads |
There is however slight difference in height.
Also the conductive area is smaller in PS pads.
But this should not make a huge difference since the copper area on the PCB is so large.
So I sacrificed one PS2 replacement conductive pad and just cut it with scissors to separate the four circular areas.
Then it was time for the first test.
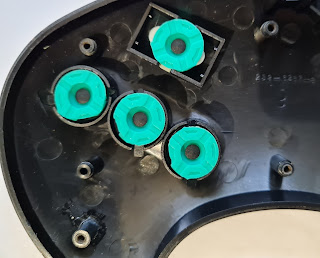 |
| The separated PS2 pads seem to fit perfectly |
Unfortunately although the pads worked, the buttons didn't feel right. You had to press the buttons really hard for the button presses to register.
 |
| Buttons were bit mushy after first test |
The height difference of the pads made a difference. So I had to pad the pads somehow. I took some thin cardboard and used the broken Mega Drive pad to draw roughly the correct size circles to the cardboard.
 |
| Perfect circles! |
The cardboard pieces don't have to be perfect. Important thing is that they fit to the small indentation that is on the actual plastic buttons.
 |
| Perfect fit! |
I used bit of paper glue to stick the cardboard pieces on top of the buttons to help with the assembly.
Now the new pads seem to be at the correct height when compared to the original
And indeed the button feel was improved. But it was still not as responsive as I wanted. So I added another layer of cardboard.
 |
| More height |
That did the trick. Now the buttons were really responsive and even had satisfying clicking feel. Really happy with those.
Then I wanted to see if I could do something with the D-pad. It also had quite worn out conductive pad. First I thought I could use the PS2 buttons conductive pad here also but unfortunately the PS2 pad is just little bit too small.
 |
| Original D-pad conductive pad on bottom and PS2 buttons conductive pad on top. Just a bit too small. |
The PS2 D-pad conductive pad is even smaller than the buttons pad, so that would not help either. So I decided to add some cardboard to the original pad to see if it would improve things.
And yes it did improve responsiveness. However when playing Sensible Soccer I noticed that diagonals were now a bit too difficult to press. So this is not something I'd recommend doing unless it is the only option. I'll try to find a better solution and post results.
Overall I'm quite happy with the results. The PS1/PS2/PS3 conductive pads are still easy to find and they are cheap, so with bit of a fiddling you can bring new life to your old Mega Drive / Genesis pad.




Comments
Post a Comment