Refurbishing DualShock 3
I have couple of DualShock 3 controllers that are working but externally in really bad shape and some of the plastics are broken around the analog sticks. So I decided to see if I can refurbish one of them using cheap aftermarket case.
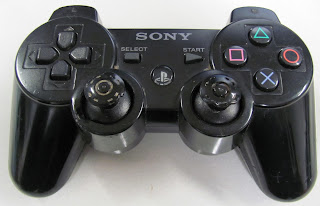
The starting point. This controller has seen better days.
Opening DualShock 3 is pretty straightforward. There are only 5 screw on the back of the unit. No hidden screws and all are same size. After removing the screws you have to apply some pressure to the back cover in the area between the analog sticks. This releases one clip that is still holding the plastics together. Then carefully lift the back cover up. You have to maneuver the cover around the trigger buttons.
The back cover removed. And the mandatory warning. Be very careful with the battery. Even though this is only joystick, the battery can be dangerous. Do not short the battery wires or damage the battery in any way.
The first thing I do is to remove the battery. Using your fingers gently wiggle and pull the connector until it comes loose. There are guiding rails, so you don't have to remember which way around the connector was. Store the battery somewhere safe.
The lower trigger buttons can be removed by just pulling them up.
After removing the battery you can see the last remaining screw. Remove it. It is the same size as the rest of the screws.
Now you can lift up the main board assembly. The plastic frame might still be held in place with clips near the vibration motors. This all depends on the model of the controller you have. There are tens of different designs.
The front cover with all parts still in place.
Only tricky part when removing the front cover parts is the light guide. Just push the four visible parts from the outside with small screwdriver and the light guide should just pop out.
Front cover with all the loose parts removed. Light guide is still in place. All the parts have some guiding holes, so you don't have to remember where each part goes. In this unit the D-pad supporting part has only three legs. This is normal. I'm assuming that there were fair amount of broken parts in the factory and they decided to use them even if one of the legs is broken. I've seen more PS controllers with three than four legs in the supporting part. And there are also variations where the supporting part is missing. In those cases the D-pad has extra part sticking out from the back which contacts straight to the plastic frame beneath the D-pad.
Sad state of analog stick caps. These are easy to replace.
The caps are held with friction and can be removed by pulling them straight up. Replacement caps are easy and cheap to find. And they usually are of nice quality.
The trigger contact pads can be removed by just pulling them away from the plastic supports.
The button contacts in DualShock 3 are printed on to a plastic membrane that connects to the main board just with pressure provided by small piece of hard foam. Usually when DualShock 3 starts acting up the problem is that the membrane is not making proper contact with the main board. This can be fixed quite easily.
First cut a piece of cardboard or tape little smaller than the foam piece.
Then insert the cardboard under the foam pad. This raises the contact points to give more pressure. Don't overdo this. Something less than 1 millimeter is enough.
I've used ordinary pencil to gently rub the the contact points in the membrane. This cleans them and adds some conductive material to the contacts.
Same for the main board contacts. Again don't overdo this. Just slight pressure.
Now that the contacts are sorted, its time to start transplanting everything to the new shell. I bought the cheapest ones you can find and it shows. The shell parts do not even fit together properly due to bad molding. Be prepared to make some modifications and sanding when buying these cheap parts.
First put all the front cover pieces in place. Again tricky part is the light guide. I ended up using the light guide from the replacement shell kit since the original would not fit. All the rest of the parts are from original controller. The replacement buttons were really nasty, so I don't want to use them if not absolutely necessary.
Problem number one. The original main board plastic frame does not fit the shell. So I have to use the replacement frame that came with the new shell.
First lift the vibration motors from the frame so the main board can be removed. Be careful not to break the vibration motor leads. They are really fragile.
Then remove the plastic membrane from the frame. This is held together in few places with melted plastic posts. Be careful not to damage the membrane. I still have the trigger button assemblies in place because I was hoping I don't have to to replace those.
Membrane in the new frame. There is very little holding it in place, so it might be wise to use some tape to hold it in place. Just make sure not to disturb any of the button contact points.
I eventually had to change the trigger plastic supports also, since the original ones would not fit and I didn't want to cut them. The membrane should come off when you gently pull it straight from the plastic.
Everything finally in place except the lower triggers, battery and back cover. Main board is also screwed back in place. I had to use the red top triggers from the replacement shell kit, since the original ones would not fit. Now it is good time to pop the back cover in place and see that everything snaps nicely into place.
Lower triggers and battery back in place. Make sure that the battery leads are not being crushed when you but the back cover in place.
Back cover in place. You have to again maneuver the cover a bit in order to clear the lower triggers and to fit the battery. Don't use excessive force. My shell kit didn't come with screws, so I used the original ones. Be careful when screwing to these aftermarket shells. The plastic is soft and it is really easy to over tighten the screws.
Finished refurbish. Not the prettiest thing. Next time I would go with black plastic.


Comments
Post a Comment