Cleaning Microsoft Xbox Controller S
Not so strange this time, but decided to show how to disassemble and clean original Xbox Controller S. These units are really easy to work with and they are quality controllers. Microsoft has always made excellent peripherals.
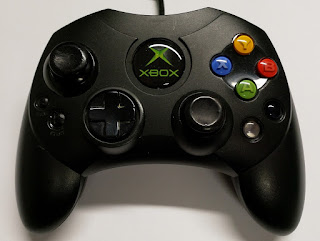 The Microsoft Xbox Controller S. Feels very sturdy. Common problem with these are that the rubber in the thumb stick caps wears out. It is difficult to source original Xbox controller thumb stick caps. However the Xbox 360 caps are compatible and they are cheap and easy to source. They are little smaller, but they sit higher up, so in the end they will be exactly in the same position as the originals.
 Back of the unit.
 One of the screws is hidden behind the label. If you don't want to destroy the label, then use sharp knife to peel off one corner and then peel the rest with your fingers. Beware that it is quite easy to rip the label.
 The hidden screw.
 All the backside screws removed. There are seven in total. All same size.
 Now you can just lift the back cover.
 Main PCB can be just lifted up also. Be careful not to snap the vibration motor leads. You can disconnect the vibration motors, but the connectors are sometimes really tight.
 There are two plastic snaps on both sides of the memory card housing. Gently lift those and you should be able to pull away the plastic housing.
 The thumb stick assembly. The caps are held with just friction and can be removed by pulling them straight up. Like said you can use Xbox 360 controller plastic caps to replace the worn original caps.
 The front part with all parts still in place.
 Front part with rubber pads removed.
 Front part with all the buttons removed. All the buttons and pads have guiding holes, so reassembly is fool proof. Be careful with the back/forward buttons assembly. The plastic is really thin and can be easily broken.
 The D-pad consists of two parts which are held together with two screws and two plastic clips. Undo the screws first and then gently push the clips in to separate the two parts.
 All the washable parts. I use soap, water and a toothbrush to clean these. Remember to let everything dry properly before reassembly.
 The main PCB. The interesting part here is the action button pad. The rubber pad does not have any conducting material. Instead the whole button area is covered with conductive tape. Not sure why it is done like this.
 I used toothbrush to clean excessive dirt and the some compressed air to clean the rest of dust.
 There were some stubborn stains around one of the analog sticks, so I used isopropyl alcohol to clean the area.
 Also gently cleaned the D-pad contacts with isopropyl alcohol.
 I don't usually disassemble the trigger buttons unless absolutely necessary. They are the only difficult parts with this controller. Usually it is enough to wipe them with some cleaning towel. I use screen cleaning wipes.
 The underside of the trigger can be cleaned by inserting cleaning wipe under the trigger and then pressing the trigger couple of times.
 Last finishing touch is to clean the cable.
 It was quite dirty.


Comments
Post a Comment